Peach Streusel Tart

This week I had to make a dessert for a grill party. So I started to think of what I could bring with me and after a few looks through my cookbooks and magazines, I decided to bake a tart. Due to the fact that it needed to be something that’s easy to transport, but at the same time it should be fruity and not run-off-the-mill stuff. I took my clotted cream apple cake recipe as a basis and created a peach streusel tart out of it. I have to say that I’m in love with my new combination! I replaced the cinnamon by ground cloves and the clotted cream by mascarpone and I also added a hint of lemon to give it more of a summery flavour. If you are a fan of fruity cakes then I can highly recommend this recipe to you. Peach Streusel TartPeach Streusel TartPeach Streusel TartPeach Streusel TartPeach Streusel Tart

Peach Streusel Tart

Pastry

  • 200gr. flour
  • 1/2 tbs backing powder
  • 125gr. cold butter
  • 100gr. brown sugar
  • 1 egg
  • a pich of salt

Topping

  • 6 peaches
  • 1 egg
  • 2 tbs brown sugar
  • 3 tbs flour
  • 130gr. Mascarpone
  • zest from half a lemon
  • 2 tbsp lemon juice

Streusel

  • 60gr. butter
  • 4 tbs brown sugar
  • 50gr. flour
  • 1/4 tsp ground cloves
  • 70gr. ground almonds
  1. For the pastry: But all ingredients in a bowl and knead everything together. Let the pastry cool in the fridge for about 30 minutes. Grease a spring form pan and preheat the oven to 180°c. Press the pastry into the pan and make an edge.
  2. For the topping: Cut the peaches into slices. Mix together the egg, sugar, flour, lemon juice, lemon zest and the mascarpone. Add the peach slices and put everything into the pan.
  3. For the streusel: Knead all ingredients together and crumble the slightly moist dough into small streusel. Spread the streusel onto the peaches. Bake for 40-45 minutes.
  4. Serve with whipped cream. Enjoy!

XOXO Lila

Devon Scones

I really love to eat scones, they always remind me of our Devon holidays. We often ate scones after a long walk along the sea. Missing Devon so badly, I tried out different scones recipes, but none of them satisfied me. Finally I stumbled over the National Trust Farmhouse Cookbook, which we bought at the beautiful Lanhydrock House, and found the perfect scones recipe: Devon Scones. For me it was the first one which was similar to the scones we ate in the UK and they don’t have the common soda after taste.

The English jam and the clotted cream I found in Zurich at a food stand in the marked hall “Viadukt”. I was so surprised that they sell clotted cream that I immediately had to buy one jar. (regardless of how overpriced it was ;-))

IMG_0001_1642 IMG_0001_1641 IMG_0001_1647 IMG_0001_1645IMG_0001_1643

Devon Scones-The Farmhouse Cookbook

  • 250gr. plain flour, plus extra for dusting
  • 1 tsp soda
  • 2 tsp cream of tartar
  • 1/2 tsp salt
  • 2 tsp caster sugar
  • 30gr. butter
  • 200ml milk
  1. Sieve the dry ingredients together. Rub in the butter. Stir in the milk to make a soft, slightly sticky dought.
  2. Flour your hands and a work surface and press the dough together. Roll out to about 2cm thick and use a 5cm round cutter to cut scones. Place on a lightly floured baking tray and bake at 220°C for 10 minutes.

Enjoy!

XOXO Lila

Summer Berry Yogurt Ice Cream

Last weekend the weather was incredible warm, I think it was up to 25°C!!! Therefore I decided to make some ice cream. We have an ice cream machine at home and during the summertime it is practically running all day long. ;-)Ever since we have an ice cream machine at home, I’ve never eaten ice cream from the supermarket again!!! Homemade is simply the best…

LilaDeLilaIceCream IMG_0001_1655 summer berry ice cream liladelila LilaDeLila LilaDeLilaIceCream

Summer Berry Yogurt Ice Cream

  • 200ml. cream
  • 200gr. yogurt
  • 200ml. milk
  • 60gr. vanilla sugar
  • 2tbsp. lemon juice
  • 1 egg white
  • 300gr. summer berries

for the almond brittle:

  • 60gr. almonds
  • 6tbsp. sugar
  • 2tbsp. water
  1. Mix together the cream, yogurt, milk, sugar and lemon juice.
  2. Beat up the egg white and fold it in the yogurt mixture. Fill into the ice cream machine and let cool for about 40 minutes.
  3. Prepare a cake tin and put half of the berries into a pan. Let the berries boil up, add the remaining berries and let cool.
  4. Put the sugar and the water into a pan, let it cook, add the almonds and mix together. Immediately take off the heat and pour the almond caramel mixture on a baking paper. Let cool and hackle it.
  5. When the ice cream is ready: Fill half of the ice cream into the cake tin, cover with half of the berries and sprinkel with some almond brittle. Fill in the remainig ice cream, berries and almond brittle in the same order as mentioned above.
  6. Put the ice cream in the freezer and let cool for about 30 minutes.

The ice cream is is ready to serve! -Enjoy!!!

-Lila-


Currant-Orange Galette

I’m extremely excited to share this really really delicious recipe with you! A currant-orange galette-very fruity and perfect with wipped cream, mascarpone or clotted cream. I baked the galette last weekend and after 20 minutes the whole galette was eaten up…

The recipe is from Jenny’s blog Zucker,Zimt und Liebe, she baked a blueberry galette and served it with ice cream. For the blueberries I used currants, the black and the red ones, and added an orange for more flavour. We always have a lot of currants in our freezer. That is because we have currant bushes in our garden and in the summer they are so loaded that we can’t eat them all up. We usually use the frozen currants for ice cream. To change it up a little, I sometimes like to try something new like this scrumptious galette.

IMG_0001_1526 IMG_0001_1524 IMG_0001_1525

 Recipe:

Currant-Orange Galette

Pastry:

  • 200gr. flour
  • 1 pinch of salt
  • 1 tsp sugar
  • 100gr. cold butter diced
  • 80ml cold water

Topping:

  • ca.230gr. currants
  • zest from 1 orange
  • 1 orange in slices
  • 2 tbsp flour
  • ca. 40gr. sugar (I used vanilla sugar)
  • 1 egg
  • 3tbsp brown sugar
  1. For the pastry: Mix together flour, sugar and salt. Add the cold butter and rub it between your fingers until the butter pieces are pea-sized. Add the cold water and kneal until everything is combined.
  2. Cover the pastry with a cling film and let rest in the fridge for 45 minutes.
  3. Preheat the oven to 220°C and prepare a baking tin.
  4. For the filling: Put the currants, orange slices, orange zest, flour and sugar in a bowl and mix together. Set aside.
  5. Take the pastry out of the fridge and roll out (ca.30cm) on a floured surface. The shape doesn’t need to be perfect- a rustic look is welcome!
  6. Put the filling in the middle of the circel, but leave a verge of 3cm free. Fold the verge over so that it covers the filling a little. Since you have to go around in a circle the verge naturally overlaps, which is what we are looking for.  Press the verge slightely down.
  7. Brush the edge of the galette with a whisked egg and sprinkle with brown sugar.
  8. Bake in the oven for about 20-30min. It tastes best right out of the oven and  served with whipped cream, clotted cream or ice cream. Enjoy!

Your Lila ❤


Apple-Lemon-Ginger Tartlets

Baking is my way to work off stress. Working with my hands, beeing creativ and to have a product in the end settles me and makes me happy. It’s my balance to school and learnig and it’s necessairy for me. So yesterday I decided to bake something and felt like creating something by myself. I checked our storage and saw that we had some apples which needed to be used up. Well…the result: Apple-Lemon-Ginger Tartlets. And here they are:
IMG_0001_1520 IMG_0001_1522 IMG_0001_1518 IMG_0001_1517 IMG_0001_1516 IMG_0001_1521

Apple Lemon Ginger Tartlets

Pastry:

  • 200gr. flour
  • 1/2 tbs backing powder
  • 125gr. cold butter
  • 80gr. brown sugar
  • 1 egg
  • a pich of salt

Filling:

  • 6 small apples
  • juice from half a lemon
  • zest from 1 lemon
  • 1 small clove fresh ginger
  • 1 tsp brown sugar

Topping:

  • 3 egg whites
  • 5 tbsp brown sugar
  1. For the pastry: But all ingredients in a bowl and kneal everything together. Grease 6 or 7 souffle dishes and press the pastry in
  2. . Preheat the oven to 180°C.
  3. Grate the apples,the ginger clove and the lemon. Add the sugar and lemon juice and mix with a spoon. Fill into the tartlets.
  4. Beat the egg white until it’s almost stiff, then add the sugar and mix until stiff.
  5. Cover the tartlets with the egg mixture. Bake for 25 minutes.

Note: Change the amount of ginger according to taste or use dried ginger for less flavour.

What’s your stress reducer or balance to your everyday life?

Love you guys and wish you a relaxing weekend.

-Lila-

Lemon Tartlets

My mum really loves a proper English Lemon Tart and since we had a jar of Lemon Curd in store that we had to use up; I decided to make Lemon Tartlets. My mum made the filling and I did the pastry. We both did freestyle baking so the recipe is self-created by my mum and me. The whole thing was really spontaneous and  we were surprised how good they turned out. (I’ve never baked a Lemon Tart before) So check the recipe out!

IMG_0001_1488 IMG_0001_1483 IMG_0001_1485 IMG_0001_1480

By the way, my mom bought this wooden box the same day at the thrift shop! Isn’t it a beautiful box?! I think it’s perfect for food photography, quite likely you’ll see this box in more pictures hereafter.

Lemon Tartlets

Recipe:

Pastry:

  • 200gr. flour
  • 1/2tbs baking powder
  • 125gr. cold butter
  • 75gr. sugar
  • 1 egg
  • a pinch of salt

Filling:

  • 120gr. Lemon Curd
  • 200gr. crème fraîche
  • 2 eggs
  1. For the pastry: Put all ingredients in a bowl and knead everything together. Preheat the oven to 180°C.  Cut out squares from a baking paper and line a muffin tin out with them. Press the pastry into the tin and cover the little tartlets with baking paper squares as well. Fill them with baking beans and blind-bake for 10-15min. Remove the baking beans and bake for another 5 minutes.
  2. For the filling: Beat up the eggs until light in colour, then add the Lemon Curd and the Creme Fraiche and mix again.
  3. Fill the filling into the tartlets and let them bake for 15 minutes. Let cool and they’re ready to serve.

Enjoy!

All my love

-Lila-

No-Knead Bread

Here is a no-knead bread recipe which my mum often bakes. The recipe is from the New York Times. It’s incredibly easy to make and that’s why this bread often sits on our breakfast table. We prefer whole wheat bread, so my mum uses half whole wheat and half all-purpose flour. She generally changes up the flours now and then or she adds some seeds to give it another twist. You can just add what you want to get your perfect bread. So here it is:
IMG_0001_1405 IMG_0001_1411 IMG_0001_1408 IMG_0001_1412

Recipe

No-Knead Bread:

  • 3 cups all-purpose bread flour (I use: half whole wheat+half all-purpose)
  • ¼ teaspoon instant yeast
  • 1¼ teaspoons salt
  • optional: different grains like sunflower seeds
  1. 1. In a large bowl combine flour, yeast and salt. Add 1 5/8 cups water, and stir until blended; dough will be shaggy and sticky. Cover bowl with plastic wrap. Let dough rest at least 12 hours, preferably about 18, at warm room temperature, about 70 degrees.
  2. Dough is ready when its surface is dotted with bubbles. Lightly flour a work surface and place dough on it; sprinkle it with a little more flour and fold it over on itself once or twice. Cover loosely with plastic wrap and let rest about 15 minutes.
  3. Using just enough flour to keep dough from sticking to work surface or to your fingers, gently and quickly shape dough into a ball. Generously coat a cotton towel (not terry cloth) with flour, wheat bran or cornmeal; put dough seam side down on towel and dust with more flour, bran or cornmeal. Cover with another cotton towel and let rise for about 2 hours. When it is ready, dough will be more than double in size and will not readily spring back when poked with a finger.
  4. At least a half-hour before dough is ready, heat oven to 230°C. Put a 6- to 8-quart heavy covered pot (cast iron, enamel, Pyrex or ceramic) in oven as it heats. When dough is ready, carefully remove pot from oven. Slide your hand under towel and turn dough over into pot, seam side up; it may look like a mess, but that is O.K. Shake pan once or twice if dough is unevenly distributed; it will straighten out as it bakes. Cover with lid and bake 30 minutes, then remove lid and bake another 15 to 30 minutes, until loaf is beautifully browned. Cool on a rack.

Enjoy!

Lots of Love:

Lila

Vanilla and Chocolate Shortbread

My sister Lisa has baked these delicious shortbreads yesterday. The recipe is from BBC but she changed a few things… So she created two different biscuits, chocolate and vanilla flavour. I’m not a huge fan of shortbread but I can’t even say why… However the chocolate ones won my heart. I love these biscuits to tea and coffee!
shortbreads shortbreads3 IMG_0001_1365 shortbreads1 shortbreads4

Vanilla Shortbread:

  • 200gr. butter
  • 180gr. flour
  • 75gr. sugar
  • 1tsp  honey
  • 1/2 vanilla bean
  1. Preheat the oven to 190°C.
  2. Beat the sugar, butter, honey and vanilla bean pulp until smooth.
  3. Stir in the flour to get a smooth paste. Turn on to a work surface and gently roll out until the paste is 1cm thick.
  4. Cut into rounds or fingers and place onto a baking tray. Pierce them with a fork to get the pattern you want and chill in the fridge for 20 minutes.
  5. Bake in the oven for 15-20 minutes, or until pale golden-brown. Set aside to cool on a wire rack.

Note: For the chocolate shortbread use 140gr. flour and 40gr. cacao and leave out the vanilla bean.

Wish you a great week!

-Lila –

Winter Season Macaroons

I love baking macaroons and it’s more than 3 years ago when I baked my first ones. I’ve always planned to bake macaroons in my holidays, but as you know I never manage to do all my planned things. So this Christmas holiday I decided to finally bake macaroons!

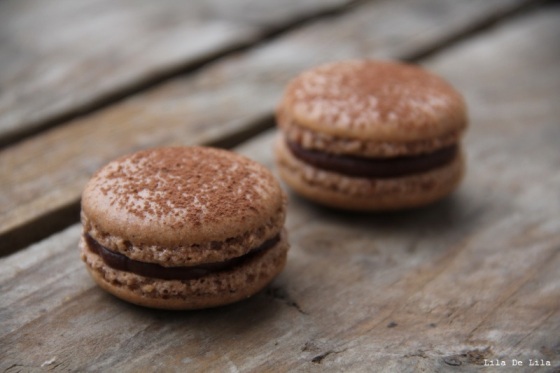
Well, I created a winter season macaroon collection composed of vanilla, orange, gingerbread and matcha green tea. I had  them all tested by my relatives and they said that they’re all tasty, but the all time favourite was the classic vanilla. (I think that’s due to the pear liquer which they love… 😉 )

My mother came across the recipe on a German food blog which is called: Letizias Gaumenfreuden. I’m still very happy with this recipe because it’s very well explained and the macaroons turn out perfectly! I think it is also great because it’s a basics recipe which you can use for creating new tastes just by adding or replacing a few things. Even if I have a macaroon book from a confectioner, which is quite good, I prefer Letizia’s recipe.

I’ll translate the recipe into English for you and I hope it will be understandable.
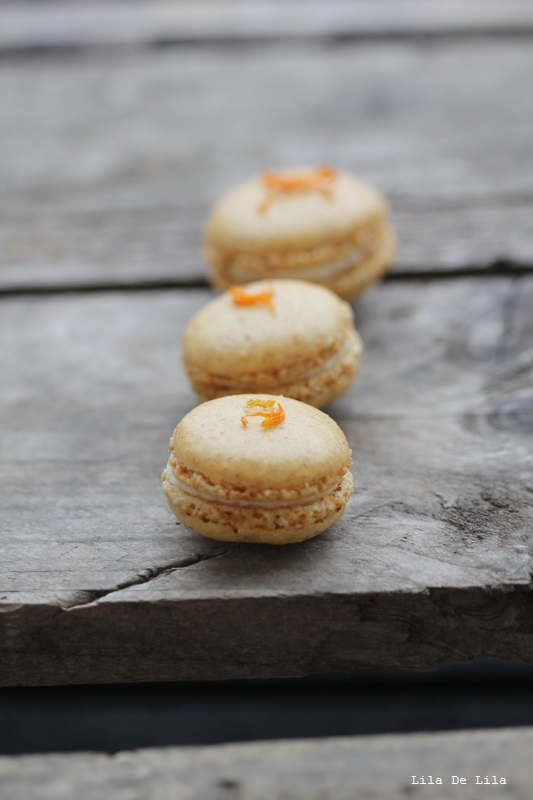
Macaroon 3 Macaroon 2 Macaroon 1 macaroon 5 orangezestMacaroon 6

Vanilla Macaroon

Recipe:

  • 90gr. egg white (3 eggs)
  • 1 pinch of salt
  • 30gr. granulated sugar
  • 200gr. icing sugar
  • 110gr. ground almonds
  • orange food coloring in powder form

Note: It’s important that you exactly weigh the ingredients! Especially the egg whites are important.

  1. Please watch the movies I’ve linked here and here first, then you’re ready to bake. Put the ground almonds into a food processor and blend until they’re very fine and sift them into a bowl.
  2. Add the icing sugar and the food coloring powder and mix.
  3. Beat the egg whites and the salt until almost stiff. Gradually add the sugar and beat again, now until stiff. The sugar should be completely dissolved, if you cut through  the beaten egg white the cut should stay visible.
  4. Spoon the beaten egg white into the almond mixture and fold it in very carefully using a spatula. The mixture should be glossy and remind you of thick lava.
  5. Prepare 3 backing tins: turn the tin over, make little dots of dought in each corner and stick the backing paper on it. ( to prevent the fluttring of the backing paper)
  6. Fill the dought into a piping bag and pipe 3cm circels onto the baking paper. -> Use a compass to draw the circles onto the baking paper.
  7. Let the baking tin rest for about 45 minutes to let the macaroon’s suface dry. (No draught!)
  8. Preheat the oven to 140°C  with air circulation.
  9. Put the tins into the oven and bake for about 15 minutes.
  10. Take the tins out of the oven. Take the baking paper (with the macaroons) off the tin. Damp the tin with water droplets. Put the paper back onto the tin, this helps to remove the macaroons.
  11. Let the shells cool. Take them from the baking tin and store in a closeable box.
  12. Let them rest for about 48 hours in a cold room or a fridge. (makes the bottom soft and keeps the shell crispy)

Buttercream For The Filling:

  • 250gr. soft butter
  • 140gr. icing sugar
  • 160 gr. ground almonds
  • 1/2 vanilla bean
  • 1tbsp peache liqeur or pear liquer
  1. Whisk the butter, add the sugar and whisk again until it lightens.
  2. Add the ground almonds, the liquer and the vanilla bean pulp and whisk again until it’s light and fluffy.
  3. Fill the filling into a piping bag and fill the macaroons with it.

This is just the vanilla macaroon recipe but if you’d like I’ll publish the others also. That was it for today.

All my love!

-Lila-

No-Knead Whole Spelt Bread

Here I have a very simple and healthy bread recipe for you. You don’t have to knead or use a sourdough. By the way my sourdough didn’t work so I have to try it again, but I will use another recipe… I won’t give up until I’ve made one that works.

IMG_0001_1280 IMG_0001_1282 IMG_0001_1284

No-Knead Whole Spelt Bread

  • 500gr. whole spelt flour
  • 1.5 tsp salt
  • 20gr. yeast
  • ca. 3,7dl water
  1. Mix together the flour and salt and make a hollow. Mix the yeast with the water and pour it into the hollow. Mix it quickly until it’s a moist and smooth dough. (No knead. You can use a spoon.) Cover with a wet towel and leave alone for about 2-3 hours.
  2. Pour the dough out of the bowl and put it in a covered  loaf pan. (24cm) If you want, you can  coat the bread with an egg white and spread a few seeds over it. (flax seeds/sunflower seeds/sesame/oats…) Leave alone for another 30min.-1hour
  3. Preheat the oven up to 230°C and bake in the lower part. Right before putting the bread in, reduce the temperature to 200°C and bake for 45 minutes.

Enjoy!

-Lila-